In today’s ever-growing internet world where users and business transactions happen online, it’s crucial for Internet users to recognize why HTTP and HTTPS protocols are placed as well as how locked Websites work in this setting.
As such you should ensure your company website is secure for several reasons. To start with, you’ll be keeping potentially sensitive information safe, but you’ll be ensuring that your visitors feel comfortable when browsing through your website.
For these reasons, it’s important to consider switching from HTTP to HTTPS. Also, when you look at the outcomes you’ll get on your SEO after switching to HTTPS, thus the decision to switch becomes easier.
This post will discuss the differences between HTTPS and HTTP and how each works. More importantly, you’ll know which protocol (HTTP or HTTPS) is the safest to use on your website and how to switch to it.
What are HTTP and HTTPS?
Following the emergence of the e-Commerce industry, Google has become more vigilant when it comes to users’ data.
Due to Google’s concern about its users’ experience, they’re constantly making changes to their algorithm. This concern saw Google encouraging users to switch their sites to HTTPS protocol since June 2014. As a result, many have improved their Google ranking.

Since Google is a Search Engine global leader, people are bound to follow what it says. That also means that when you’re developing your website, you should ensure it can be integrated with Google’s RankBrain.
Therefore, before you switch your site to HTTPS it’s important that you’re familiar with the differences between HTTPS and HTTP. Without much ado, let’s dive right in!
For some reason, you may have once thought that there is a slight difference between HTTP and HTTPS. But the truth is, they’re very distinct. And to better appreciate their differences, we’ll dig deeper into each of them and later highlight the distinguishing features.
Http: What It Is and How it Functions
In full, HTTP stands for Hypertext Transfer Protocol, a specific data transfer channel between a client and a server. In this case, the client is the browser used by searchers when accessing the internet. On the other hand, your website is the Server.
On top of that, all client-server HTTP communications occur through a port assigned the number 80. Here’s an inside look at the simple version of the HTTP client-server communication.
The HTTP Client-Server Communication Process
You can liken the HTTP client-server communication with two people talking to each other in an open area. The first person requests details on a particular topic, and the second one provides feedback or responses. (Browser sends requests while the Server sends responses)

And since they are talking in an open area, anyone can listen to their conversation and extract details. (Later in this post, we’ll use this concept to establish the main difference between HTTP and HTTPS)
Here’s a step-by-step HTTP communication process.
Step 1: Browser is directed to URL
The process begins when internet users direct their browsers to your web address. It can be by typing your URL on the search bar or following your link from an already opened page. If your website uses the HTTP protocol, the browser will send requests to the server through the HTTP path.
Step 2: The Browser Looks for IP address
An IP address is a number used to label devices and servers connected to a network. During the HTTP client-server communication process, the browser establishes the computer’s IP address hosting your URL. It does this using the Domain Name System resolver (a program that converts domain names into IP addresses)
Step 3: The Browser Sends the HTTP request
After mapping your site’s domain to an IP address, the browser sends an HTTP request. Let’s look at an example of a simple browser request.
GET / index.html HTTP/1.1Host:www. Example.com |
In the first line, the first word, “GET”, is the HTTP verb that tells the Server that the browser wants to read your site’s content.
All your site’s content is stored on the Server. Therefore, the browser has to specify the page to be loaded. In this case, it does that using the “index.html.” Finally, the last part of the first line,” HTTP/1.1,” specifies the protocol and its version (that is, protocol HTTP, version 1.1)
The whole of the second line shows your site’s domain. This part is essential since your website’s Server may be hosting multiple sites. Therefore, the browser has to specify the domain.
Step 4: The Server sends an HTTP response
Once the server receives the HTTP request from the browser, it gives the response beginning with the protocol & version, followed by headers, and finally, the actual document requested. Take a look at the example below.
HTTP/1.1 200 OKContent – Type: text / htmlContent – Length: 208 |
HTTP is the protocol, while 1.1 is the version. The number that follows “200” is a status code that tells the browser that the details requested have been found successfully”OK.” If for any reason, the information requested cannot be found, the status code will be different. For instance, “file not found” is represented by the 404 status code.
The next part of the HTTP response is the headers, which feed the browser additional information that helps it to deliver the content to the user. The “content-type” header shows the browser the type of content the Server is sending back. In this case, it is “text/HTML.”
On the other end, the “content-length” header shows the browser the size of the document (in bytes) from the Server. This way, the browser can establish the file’s download time. In the example, the content length is 208 bytes.
After the headers, the HTTP response reveals the requested document to the browser.
Step 5: The Browser Presents the Response
After receiving all the necessary information about the request, the browser presents the response to the user. This marks the end of the HTTP communication.
Now that we’ve seen the whole HTTP client-server communication process, it’s crucial to note that it has a huge drawback. Which is? The entire process occurs in the form of plain text. That means the communication is not encrypted and, therefore, can be compromised by a third party.
That is to say, if web visitors submit confidential details through your website (if you’re using HTTP protocol), a hacker can easily tap into the process and steal sensitive information. This pitfall is the clearest difference between HTTP and HTTPS.
The fact that HTTP connections are insecure results from the channel not being encrypted by a Transport Layer Security (TLS), formerly known as Secure Socket Layer (SSL). TLS is a protocol that encrypts the communication between your website and the searchers’ browsers.
If your site lacks the TLS protocol, it means that communication exchange with your visitors is vulnerable to attack by a third party.
And for the internet to be a safe place to wander, browsers usually flag HTTP sites as insecure, bringing one thing to perspective. If you are using the HTTP protocol on your site, your web traffic will decrease significantly, which results from the users trying to stay in safe zones on the internet.
The following are the potential attacks associated with HTTP protocol:
- Leakage of personal information – since the HTTP client-server communication is not encrypted, the end-user personal details like credit card numbers and passwords are at great risk of landing on unauthorized hands. This potential attack puts e-Commerce websites in the greatest danger.
- DNS Spoofing – Domain Name Service (DNS) spoofing refers to a situation where third parties tap into the HTTP communication process, divert the users from your site, and redirect them to another.
- Denial of Service (DoS) attacks are cyberattacks that make your site unavailable to internet users.
Advantages of HTTP
- It does not require any Runtime support
- HTTP may be applied with other protocols on the net or different networks
- The HTTP pages can be accessed quickly since they’re stored on internet caches and on the computer
- Platform independent that supports cross-platform porting
- It can be used over Firewalls. Plus global Apps are possible
- Since it’s not Connection-Oriented, no network overhead can be created to maintain session states and data.
HTTP Limitations
- Lacks privacy since anyone can access your content
- Data integrity is compromised as anyone can change the content. For this reason, HTTP is insecure because it does not use any encryption methods.
- It’s unclear who you’re talking to since anyone who accesses the request can acquire your username and password.
Https: What It is, How It Functions, And The Benefits
The simplest definition of HTTPS is a secured version of HTTP. The full meaning is Hypertext Transfer Protocol Secure (HTTPS). The last S in the initials pulls out the difference between HTTP and HTTPS.
Unlike the HTTP that is open for attack by a third party, HTTPS uses the 443 port that is heavily encrypted to maximize security during the client-server data transfer. The encryption comes in handy mostly for sites that deal with users’ sensitive information like premium accounts passwords, email services, and bank account details.

But even if your site doesn’t involve personal credentials, it’s overly important to ensure you are using a secure protocol. As mentioned earlier, browsers these days flag out insecure sites, and the bets are, you don’t want to lose web traffic.
With that in mind, let’s find out how HTTPS works.
The HTTPS Client-Server Communication Process
Do you remember that example we used when introducing the HTTP client-communication process? The one that two people are communicating in a public place? Well, let’s apply it here as well. But this time there’ll be a slight difference.
In the example in HTTP communication, we mentioned that the two people were talking in an open place where whatever they discuss, a third party can listen to. In the case of HTTPS protocol, the two individuals communicating are still in a public place. But this time, they’ve come up with techniques to ensure there’s zero leakage of whatever users are talking about.
In simple terms, HTTPS client-server communication is a secure version of the HTTP protocol. That means the whole communication process we discussed in HTTP is the same here. The difference slips in when HTTPS employs an encryption protocol to secure the communication fully. The encryption protocol is called Transport Layer Security (TLS), which, as mentioned earlier, was formerly called Secure Socket Layer (SSL).
The encryption process features a complex series of procedures. But to ensure you get every detail, we will explore it into an easy-to-understand version that is super easy to comprehend. So, shall we begin the encryption process?
HTTPS Encryption Procedure
As you already know, this procedure is what sets the big difference between HTTP and HTTPS. The process is essential as it ensures the HTTPS protocol is end-to-end secured. That means no one outside the client-server communication can read or listen to the details.
The most secure HTTPS encryption is called asymmetrical cryptography. The process requires two cryptographic keys (pieces of information which, in most cases, are huge sets of numbers) called private and public keys.

When the browser wants to send a request to the server over the HTTPS Servercol, it uses the server’s public keys to generate a secret that will keep the communication safe. The secret is in the form of Ciphertext (plain text that has been scrambled and transformed to an unreadable version).
The browser used the server’s public keys to generate the secret. That means only the server will have the private key to decrypt the secret.
But since asymmetrical cryptography involves large pieces of information and complex math problems, the process may slow down the communication process if it were to be used throughout the client-server connection.
Therefore, asymmetrical cryptography is only used at the beginning of the communication session. But how will the rest of the communication remain private? When the browser generates the secret, the two (browser and server) have to agree on a single session key that they’ll both use to encrypt and decrypt details throughout the HTTPS communication sessions.
That is to say, they’ll use a common key to encrypt the remaining part of communication, a process called symmetrical cryptography. Encryption using a shared key makes secure transmission less complex and much faster.
Steps of TLS Handshake Protocol
The agreement process between the client and the server to come up with a common session key is called handshake. Here’s the TLS handshake protocol when people want to visit your HTTPS website.
Step 1: The user’s browser contacts your website’s server and requests a connection. The server, in turn, replies with a list of algorithmic toolkits called cipher suites, which creates encrypted connections.
The client (browser) compares the cipher suites with its list, selects one, and then informs the server that they’ll be using it.
Step 2: The server provides a digital certificate, which acts as an identity card and is usually issued by a third-party authority. Once the browser receives the certificate, it confirms the authenticity before proceeding with the connection.
Step 3: The client and the server establish the session key they’ll use in the rest of the communication. The client randomly selects a number using the server’s public key and sends it back for decryption. The two parties will then use that number to establish the session key and mark the end of the handshake protocol.
With that out of the way, why should you bother using HTTPS on your website? To get precise answers to this question, let’s look at what HTTPS provides.
Advantages of HTTPS
Oftentimes, sites operating using HTTPS have an integrated redirect. Therefore, even as you input HTTP://, this is redirected to an HTTPS using a secured connection.
It lets users carry out secure e-commerce transactions, like online banking.
The use of SSL technology helps protect all users thus building trust
The identity of a certificate owner is verified by an independent authority. That means each SSL Certificate has unique and authenticated information on the certificate owner.
Limitations of HTTPS
- HTTPS protocol will not prevent the loss of confidential information included on the cached pages on your browser
- HTTPS helps boost computational overhead along with the organization’s network overhead
- SSL data might be encrypted during transmission only on the network. Meaning that it cannot clear the texts in your browser’s memory
Benefits of HTTPS
1. Confidentiality
You certainly want the communication between your site and your visitors to be end-to-end in that only your server and the web browser can access the content. Imagine a situation where you’ve finally got a breakthrough in convincing your site’s visitors to submit their email addresses to you.
But due to using an insecure client-server communication protocol, a hacker on the internet taps onto the channel and steals your email list. But with HTTPS protocol you can avoid such situations.
It guarantees that all the information will remain locked and only accessible by the users’ browser and your website’s server. In other terms, it ensures world-class privacy.
That way, there’ll be zero leakage of information to third parties during requests – responses sessions between your site’s server and the users’ browsers. Confidentiality is one of the major differences between HTTP and HTTPS.
2. Integrity
Did you know that cybercriminals can compromise client-server communication and alter the details getting transferred from your website to users’ browsers? They can add advertisements to your site, change the quality of images, or even worse, change the content of articles on your site.
Https comes in as a problem solver by offering complete integrity. It does this by featuring heavy security measures which ensure the requests and responses during the browser-server communication reach the destination while compact and unaltered.
As a result, chances of details modification in the communication channel or your website is canceled out. Put differently, the browser requests and server responses will reach the destination in the correct form.
3. Authentication
The major problem in the client-server communication model is that the two parties don’t know each other. Therefore, the server has to prove its identity by presenting an HTTPS certificate. If the server lacks the certificates like in HTTP protocol, the browser will fail to establish the true identity of the server.
In such a case, a Server intruder can easily hack into the client-server channel and redirect the browser to a fake website. This results from the browser failing to recognize the authenticity of the original website and thus will accept any redirection.
But when using HTTPS protocol, your website will have the authentication certificates to identify your server to the users’ browsers. This way, you’ll prevent all the possible client redirections resulting from interference by a third party.
With the HTTPS certificates proving to be essential in secure connections, let’s take a deeper dive and discuss them comprehensively.
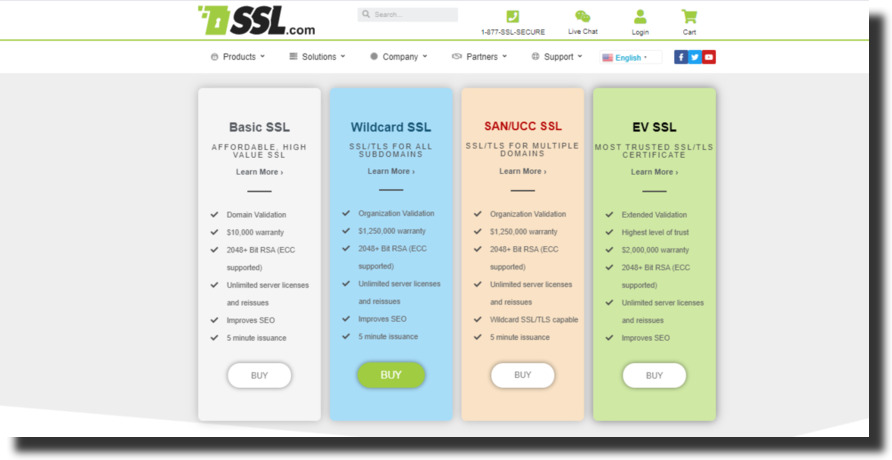
Types of HTTPS Certificates
HTTPS certificates are TLS or SSL documents that may contain information like public keys associated with a domain name, the company controlling the domain name, and the validity period of the certificates. The certificates are issued by a trusted third party known as Certificate Authority (CA).
As you already know, these certificates are essential in identifying your website to the browsers during the client-server communication process. Here are the types of HTTP Certificates according to identity validation and the number of domains covered.
According To Identity Validation
1. Extended Validation (EV) Certificates
EV certificates verify the right of your website to use the specific domain name. In other words, it shows the legal organization hosting your site. You should note that this is the most authentic HTTPS certificate. This results from the CA conducting thorough background checks on the site before issuing an EV certificate. The following are the checkpoints the CA focuses on when issuing an EV cert:
- Verifying the physical, operational, and legal existence of the organization hosting your site
- Confirming that the organization’s identity matches official records
- Proving that the organization has authorized the issuance of the EV certificate for your site
- Verifying that your site’s host has the rights to use the domain name
If you apply for an EV certificate for your site, the CA can issue it within 2 – 7 days.
2. Domain Validated (DV) Certificates
This is an HTTPS certificate issued by CA to show that your site’s domain matches a specific public key. A DV certificate is simple and only shows the encryption information.
Put differently, it doesn’t reveal the identity of your site’s host. When internet users click on the Secure Site Seal (the padlock sign that appears on HTTPS sites), a DV certificate only provides security information. Additionally, a DV certificate is cheap, and a CA can issue it in minutes after application.
3. Organization Validated (OV) certificates
Similar to DV certificates, OV certificates contain your site’s domain name details. Additionally, OV certificates show the site’s URL as well as information about the company hosting or running the website. Moreover, the certificate can be issued within 1-3 days after application.
According to the number of domains covered
1. Single Domain Certificate
This type of Https certificate only protects one domain name. For instance, if your domain is ‘www.domain.com’, the certificate will not cover ‘mail.domain.com’ or any other subdomain.
2. Multiple Domains Certificate
Multiple domains certificate is also called Unified Communications Certificate (UCC) or Subject Alternative Names (SAN) certificate. Unlike the Single Domain certificate, this one can cover different domains and subdomains. That means it’s not limited to a single domain, which is to say, you can mix several domains and subdomains.
For example, you can use it to cover all the following examples of domains and subdomains at once: example.com, www.example.com, example.net, mail.example.com, example.org, etc. However, this certificate has a limited number of domains it can cover.
What’s more, the number of domains and subdomains it can cover varies with its price. The higher the price you pay when buying it, the higher the number of domains and subdomains it can cover (but there is a limit).
3. Wildcard Certificate
The advantage of the Wildcard certificate is that not only does it cover your site’s main domain. It also covers a limitless number of subdomains. The flip side of this certificate is that it only covers the subdomains of the main domain.
That is to say, if your main domain is ‘example.com’, a Wildcard certificate will only cover the matching subdomains.
In general, HTTPS certificates (TLS or SSL certificates) play an essential role in establishing a secure connection when the browser communicates with your site’s server. It’s only by Server these certificates that your site will migrate from HTTP to HTTPS protocol.
What Is The Difference Between HTTP and HTTPS?
After discovering the science behind the two, pulling out the difference between HTTP and HTTPS is now a downhill ride. The following are the major differences:
Difference #1
HTTP involves the exchange of plain text between the client and the server. On the other Server, HTTPS involves encrypted data transfer (Ciphertext) that cannot be altered or read by a third party. Look at the explanation below for perfect clarity.
Get /hello.txt HTTP/ 1.1User-Agent: Curl/7.63.0lib.curl / 1.11Host: www. Example .comAccept – language: en |
In HTTP client-server communication, attackers will see the exact details of the above example. This is because the method of data transfer is plaintext. That way, they end up stealing critical information of the user trying to interact with your site.
In HTTPS requests and responses, the whole channel is end-to-end encrypted. If cybercriminals try to tap into the above client-server request, they won’t see the exact details. Instead, they’ll see something like:
t8Fklikeln89lkkhjfyhlsajwo68+iukskjhgkdgk+jdkkgskhk
Difference #2
Another difference between HTTP and HTTPS is that the former sends data over port number 80 while the latter uses port number 443. HTTP and HTTPS ports are communication endpoints that identify specific processes and the type of data being sent and received during the client-server communication.
Https port encrypts the network between the client and the server while HTTP ports are open. As a result, HTTPS ports are mainly used when data security is of great importance. In contrast, HTTP ports are used primarily where the data volume matters more than the security.
Difference #3
HTTPS connections require Transport Layer Security Certificates while HTTP connections occur without them. The security certificates are crucial in establishing secure connections between the client and the server. We’ll discuss Server security certificates comprehensively in a few moments.
Summary Table: Differences between HTTPS and HTTP
| Https | Http |
| Data transmission is encrypted and occurs as Ciphertext | Data transmission is not encrypted as it happens in the form of plain text |
| Client-Server communication takes place through port number 443 | Client-Server communication takes place through port number 80 |
| The server must have security certificates for a secure connection | The connection is established without security certificates |
| HTTPS URL appears as https:// | HTTP URL is typed as http:// |
| HTTPS is considered a ranking factor | HTTP doesn’t enhance your website’s SEO |
Now that you know the difference between HTTP and HTTPS, which one should you use on your website? Let’s solve that right away.
HTTP or HTTPS – Which One Should You Use In Your Website?
You may have been thinking about HTTP & HTTPS. And chances are, you’ve been wondering about the one suitable for your website. Well, here is your answer. Judging from the fact that HTTPS includes heavy encryptions, you should be using it on your site.
If you think that HTTPS is only meant for sites that handle sensitive user data, consider this. An insecure site attracts lower rankings in search engines like Google. You should know that search engines are in pursuit of optimum web security. Therefore, your online visibility will be at risk if you don’t use a secure protocol on your website.
Even worse, web browsers are evolving towards flagging insecure sites, which translates to users knowing whether a site is secure or not. Needless to say, no one is willing to risk being a victim of a cyberattack, which reflects people avoiding insecure sites.
In light of this, ensure your website is using the secure protocol. The security difference between HTTP and HTTPS should open your eyes that the second one is your best fit.
A Step-by-step Procedure Of Switching to Secure Protocol In Your Website
From the beginning, you’ve learned all the ins and outs of HTTP and HTTPS protocols. Even better, you can now spot their differences and tell which one is the safest to use on your website.
Now, let’s look at how you can switch your website from insecure to secure protocol without compromising on your online visibility (Search Engine Rankings).
The switching process is simply moving your website from HTTP to HTTPS since the latter is the secure protocol.
Step 1: Choosing a TLS or an SSL Certificate
Switching your website from HTTP protocol to HTTPS begins by choosing the security certificates. It’s critical that you only opt for SSL certificates that best fit your site. That brings us to the big question, which Https certificates should you choose? Simple.
If you own an e-Commerce website, an Extended Validation certificate will work best for you. That’s because the certificate provides detailed credentials of your site and your host. This way, it strengthens the security and authenticity when web browsers establish secure connections with your website.
This means an EV certificate enhances tight security during the browser-server requests and responses. On the other hand, if your site is not selling anything (e.g. a blog), Domain and Organization Validated certificates are your perfect match.
Additionally, if you want to verify one domain name, a Single Domain certificate is your ideal choice. In contrast, when you need to verify several domain names, a Multiple Domain certificate is your ultimate option.
And finally, a Wildcard Certificate works best if you want to authenticate one domain name but with several subdomains (related to the main domain).
You should keep in mind that your site will only have tight security by choosing the best fit SSL certificate.
Step 2: Buying The SSL Certificate From a Certificate Authority (CA)
After identifying the security certificate that fits your site best, it’s time you acquire it from a CA. As mentioned earlier, a CA is a trusted third party that issues SSL certificates to websites.
Before you can buy an SSL certificate, you’ll need a Certificate Signing Request (CSR) which is a piece of text you’ll have to generate on your web server. The CA will use the information in the CSR to create the certificate – like the name of the organization behind your site, public keys, and your domain name.
The procedure of generating a CSR using the cPanel
Here’s the procedure of generating a CSR using the cPanel – an application provided by many sites hosted for easy web management.
- Log into your host’s cPanel account. (An account provided by the web host to allow you to manage your website)
- Go to the “Security” section and click on the “SSL/TLS”. See the picture below (themes in the cPanel may slightly differ, but the category structure is the same)
- Go to “Certificate Signing Requests (CSR)” and click on the “Generate, view, or delete SSL certificate signing requests.”
- Fill out the CSR information carefully. After confirming that all the details you’ve provided are error-free, click “Generate”, which appears at the bottom of the page.
- A Private Key and a CSR will be generated
After generating a CSR, the Certificate Authority will verify the details before issuance. It does this by ensuring the details you provide in the CSR match your WHOIS record, which shows contact and ownership details of your domain. Upon successful verification, the CA issues the SSL certificate.
Certificate Authorities Trustworthy
However, you should note that Certificate Authorities vary in trustworthiness. That means you should be wise and only buy your SSL certificates from reputable third parties. This is vital since browsers have a list of certificates from authentic CAs.
And if your HTTPS certificates don’t fall in their lists, you’ll have wasted time and money. Worse still, the browsers will present untrusted error messages to the internet users, causing great harm to your site’s traffic volume.
So, how do you ensure you buy your SSL Certificates from a trusted CA? Firstly, you can dig into the CA’s audit details to establish the level of trust. Usually, Certificate Authorities are audited every year to ensure they align with the verified protocol of issuing SSL certificates. Getting the audit’s details will make you opt for a reputable CA.
Also, you can check the CA’s working records. How many browsers and devices is it working with? Knowing these details will help you establish the trust level of the CA in the industry. A CA working with many organizations provides valuable SSL certificates that add impact to your site’s security.
You can buy your SSL certificates from widely trusted CA’s like GlobalSign, SSL2Buy, GoDaddy, and Symantec.
Step 3: Installing The Https certificates on Your website
After buying the SSL certificates, you have to install them on your website to initiate the HTTPS protocol. The following is the installation procedure:
- Log into your cPanel account using your username and password.
- Scroll down to the security section and click on the SSL/TLS button (Alternatively, you can use the search feature to find the SSL/ TLS button)
- Under the “Install and Manage SSL for your site (HTTPS),” click on the hyperlink “Manage SSL sites” as shown on the image below.
- Select the domain name on which you want to install the TLS certificates
- Copy and paste the Certificates files
After selecting your domain, you need to copy and paste the certificate files from the CA into their specific text box, as shown below.
Certificate (CRT)
In this box, you are supposed to copy and paste the full text on the SSL certificate, including the header and the footer. That is, –BEGIN CERTIFICATE— and –END CERTIFICATE–. If you received the SSL certificate in the form of a ZIP file, you should first extract all the details and then use a text editor to copy and paste the text content.
Private Key (KEY)
This section will be filled with the private key that was created when generating the CSR. If you followed the procedure in step 2, the cPanel will automatically fetch the Private Key (Key) text. If you generated the CSR and Private Key outside your cPanel, you’ll be forced to import the private key from the server you used. In such a case, you’ll need to copy the private key and paste it into the appropriate box during the installation process.
Certificate Authority Bundle
It’s a collection of intermediate certificates that helps browsers and devices to understand the CA that issued the SSL certificates. The certificates in a CA-Bundle are essential in completing the end-entity certificate chain. Their absence could trigger security warnings on browsers.
The CA-Bundle comes along with the SSL certificates, and therefore, you should copy the file and paste it into the CABUNDLE box during the installation process.
6. Click on the “Install button” (check the end of the image above)
After a successful copy and paste procedure, you can click on the install button to have the SSL certificates in your domain. Upon successful installation, your website will be accessible through the HTTPS protocol on the domain you provided in the switching process.
However, you must verify that the HTTPS certificates are set up correctly. You can do this using SSL checker tools which can help you identify and solve possible installation errors. But rest assured, if you followed the copy and paste procedure faultlessly, the installation will be error-free.
Step 4: Changing All Your Internal Links to Https
In this step, all the HTTP internal links in your site will get changed to HTTPS links. HTTP internal links look like this http://mydomain.com. During the switching procedure, the internal link has to be changed to look like this https://mydomain.com. That way, your site will fully operate on the HTTPS protocol.
Migrating all your internal links is a big job, especially if your site is enormous. Luckily, free tools are available to help you convert all the hard-coded and relative internal links to the secure protocol. An example of such tools is Database Search and Replace Script in PHP. The tools will fasten the process and help you switch quickly and accurately to HTTPS.
This process is critical as it helps you eliminate the possibilities of mixed content. Mixed content occurs when some of your website’s elements load up over the secure protocol (HTTPS) while others on HTTP connection. A perfect example is when text data in your web pages load over the secure connection while other resources like images and videos loading on an insecure HTTP connection.
The mixed content error is harmful to your SEO visibility and search engine rankings. Therefore, you should give this step (changing HTTP links to HTTPS) close attention to ensure it is perfectly done.
Step 5: Setting Up 301 Redirects From Http to Https
A 301 status code shows that a webpage or website has permanently moved to another location. When migrating your site from HTTP to HTTPS, 301 redirects will tell search engines that your site has changed. As a result, the search engines will have to index your website under the new protocol.
If your website uses a Content Management System (CMS) – for example, developed with WordPress, you can automatically use the 301 redirects to drive traffic from servers to your new secured site. On the other end, you’ll be forced to do manual 301 redirects if you’re not using a CMS on your site.
Step 6: Add The Https Version of Your Website On Google Search Console and Update Disavow file
After a successful switch from the insecure to the secure protocol, you must set up a new search console account. The reason behind this is that information in your previous account will not reflect on your new HTTPS site. As such the Search Console is a great tool when it comes to SEO.
And without a doubt, you’re not ready to let your previous SEO effort sink altogether, especially when it comes to disavowing spammy backlinks that are harmful to your SEO.
If you previously had a disavow file in your, you must resubmit it to ensure the spammy backlinks will not harm the SEO in your current secure version of your site.
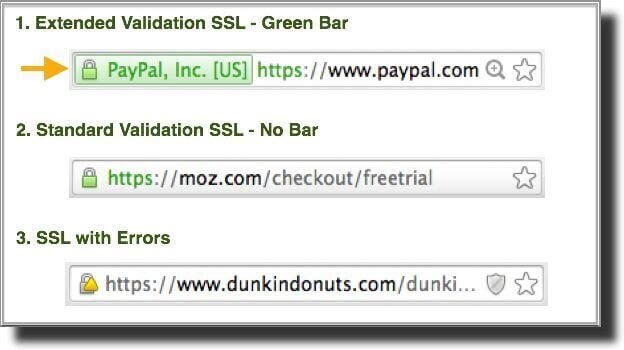
Step 7: Confirm That Your Site is Running Smoothly on The Secure Protocol
Now that you’ve finished the difficult part of the HTTP to HTTPS shifting process, it’s time you confirm that everything is set up correctly and your site running smoothly. In this last step, you pretend to be a visitor to your site just to inspect the user experience.
When doing this, you should first confirm that there’s a padlock sign on your web address. Secondly, ensure that the previous ‘HTTP’ at the beginning of your web address has changed to ‘HTTPS.’
If that’s the case, then all your SSL certificates are successfully installed. Also, all HTTP internal links changed to the secure protocol. This shows a successful switching process.
SEO Concerns When Switching From HTTP
Making the switch to HTTPS might not be easy. In some instances, switching from Https can affect your SEO efforts negatively. And to help you avoid these pitfalls, here are some tips you need to keep in mind.
Confirm that You have the right Certificates
Other than the SSL, there are several other certificates you should know about. These include:
- Wildcard SSL – that secures unlimited subdomains and website URLs
- Single Domain – that is issued for a single domain or subdomain.
- Multiple Domains (Unified Communications Certificate) – helps secure different primary domains and subdomains
From the different certificates available today, always ensure that you get the right one to meet your domain needs. In doing so, you’ll ensure your SEO boosts aren’t hindered by technical errors.
Notify Google that Your Site Has Switched to Https
Note that Google isn’t automatically notified that you’ve moved to HTTPS. As such, they won’t know until they crawl your site. That might take a while, and your SEO will be dropping every day.
To avoid the lengthy process, be sure to inform them once you complete making the switch. Doing so means that they’ll give your site a rating boost. Hence your site will have long-term rating boosts.
Ensure That Search Engines Can Index Your Page
Note that your ranking will be impacted negatively if search engines cannot index your page. This can remove your rankings. Plus building your rankings again might take you a long time. Therefore, make sure your site supports search engine crawling.
Google should be able to access your robots.txt. This way they’ll have clear crawling instructions. If Google cannot crawl your site, it means that you won’t be able to improve your SEO. When Google cannot crawl your website, this can affect your search rankings negatively.
Generally, this happens after you’ve switched your site to HTTPS. Also, remember to update your test servers so they allow bots to crawl the site. Thus, it will eliminate any hang-ups.
Monitor Your HTTP to HTTPS Shift
To help keep track of the shift, use analytics software like Google WebMaster tools. This ensures the entire process goes smoothly. Also, it helps capture any issues that occur earlier on, which ensures they won’t lower your SEO rankings.
Should You Switch Your Company Website To HTTPS?
To successfully switch to the secure protocol, you must first know the in-depth meanings and differences between HTTP and HTTPS. Also, make sure you understand how they function or work to better appreciate their differences. In doing so, you’ll identify the most secure protocol for your site.
As you switch your site to HTTPS, you should take the time to do this as there are several steps involved. Even then, the effort involved is worth the results you’ll achieve.
HTTPS has thus far become a standard protocol. That means if you take longer to implement this protocol, then you’re likely to have a hard time getting ahead of competitors.
Even after you switch your organization’s website to HTTPS, realize that this is the beginning of building your site’s SEO.
As such, HTTPS setup is among the factors that affect your ranking. Also, be sure to consider how your website and content fare against the top-ranking pages in the SERPs.
HTTPS and HTTP: FAQs
Which is better HTTPS or HTTP?
Between HTTPS and HTTP, HTTPS is the better option. That’s because it improves user trust and boosts your site’s SEO too.
Is HTTPS faster compared to HTTP?
Well, it’s not as simple as that. At first, there are several connections that HTTPS must make to ensure your connection is secure before it can actually transmit any Data. This takes some time, however, HTTP/2 connects faster.
Gradually, we have more sites updating to HTTP/2.
Why is HTTPS more secure than HTTP?
HTTPS offers a more secure connection than HTTP since it delivers data in encryption form. The encryption will then be opened only by the recipients.
This helps make it safe from any cyber attacks.